Brisamar B9
Approximately9 m²Shade area
Structure poles
7 sections: 4 thin + 3 thick.
Assemble two arms with 2 thin sections each. Use the 3 thick sections for the upright pole.
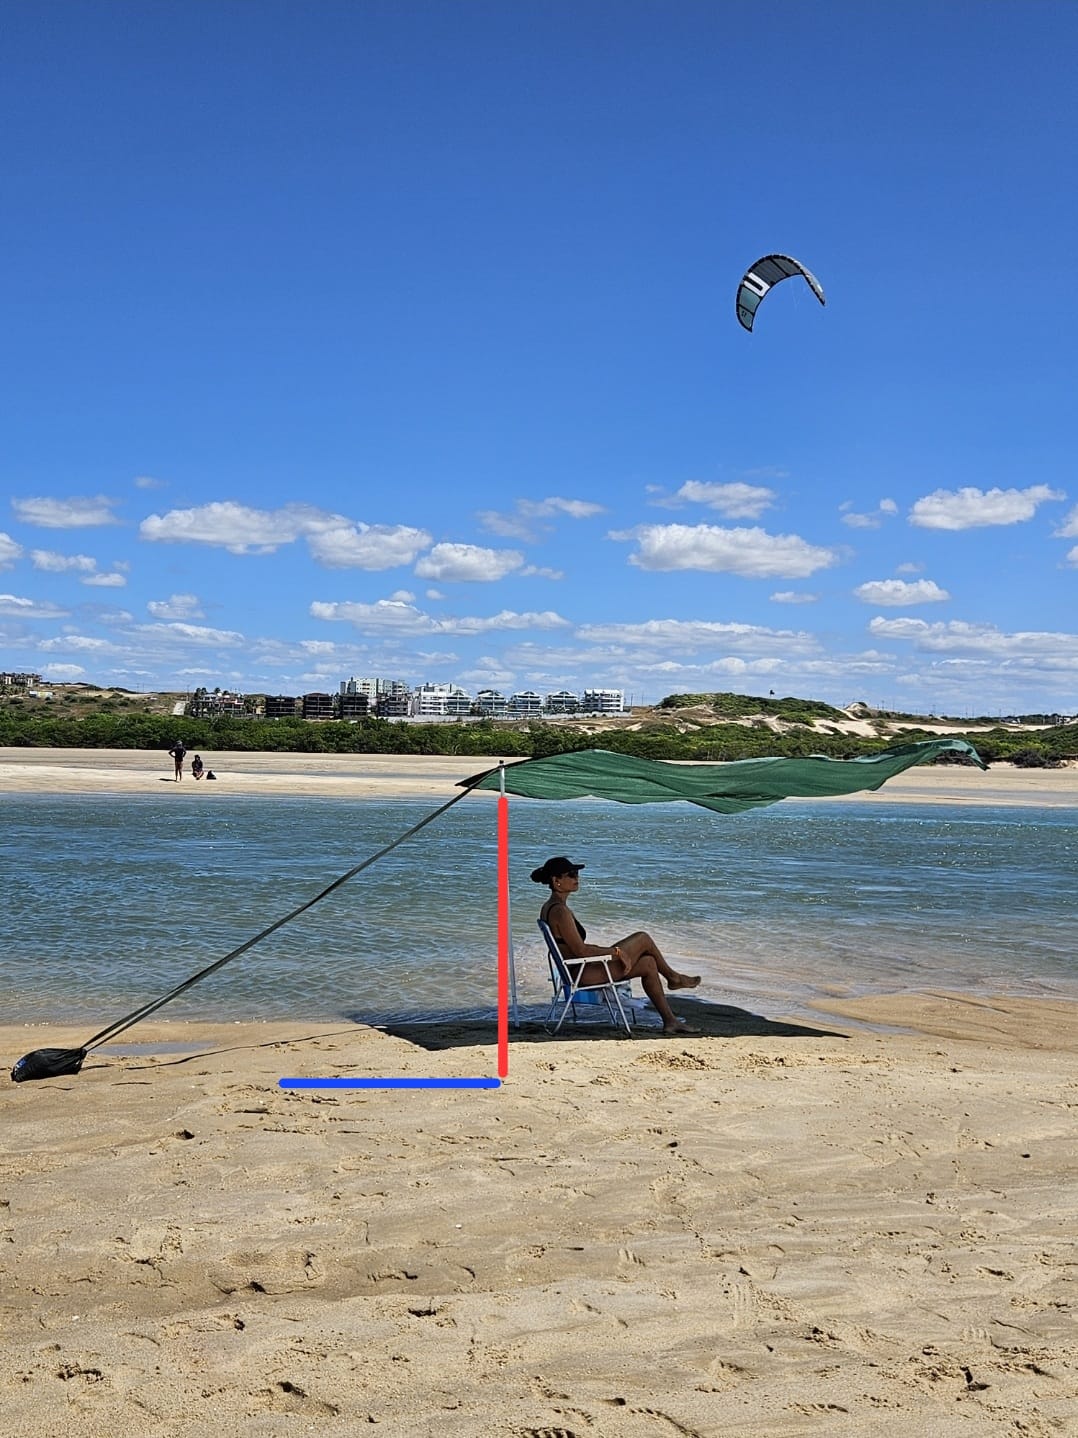
Guyline attachment point
At the top of the upright pole.

Choose your model and check its setup. B9 and B20 have different numbers of pole sections and different guyline attachment points. Ground anchoring, wind alignment and the counterweight follow the same principles.
The main difference between the models is the projected shade area: approximately 9 m² for the B9 and approximately 20 m² for the B20.
The actual area depends on the setup height, the position of the sun and wind speed.
Approximately9 m²Shade area
7 sections: 4 thin + 3 thick.
Assemble two arms with 2 thin sections each. Use the 3 thick sections for the upright pole.
At the top of the upright pole.
Approximately20 m²Shade area
9 sections: 6 thin + 3 thick.
Assemble two arms with 3 thin sections each. Use the 3 thick sections for the upright pole.
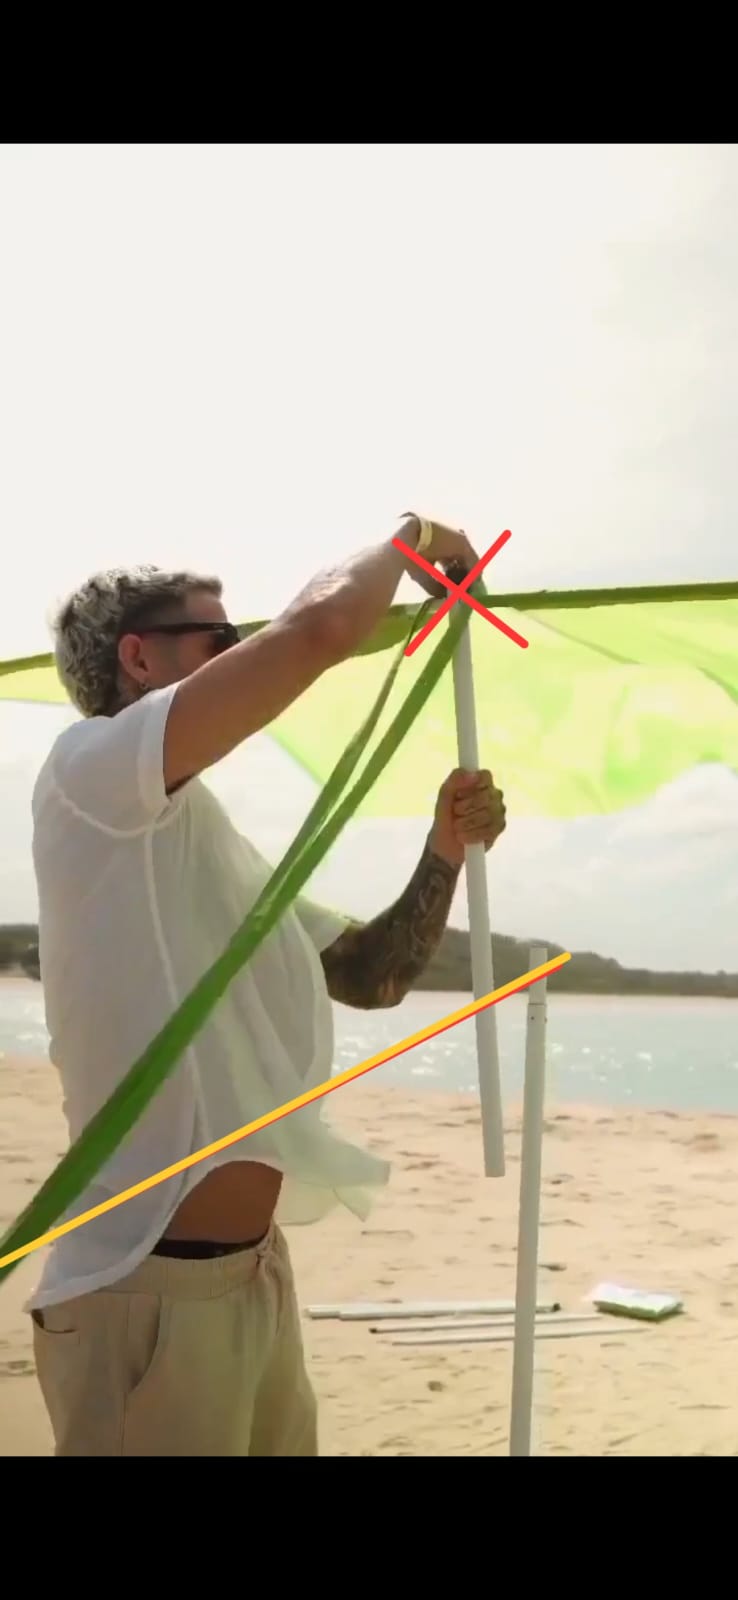
At the height between the penultimate and final sections of the upright pole, below the top.
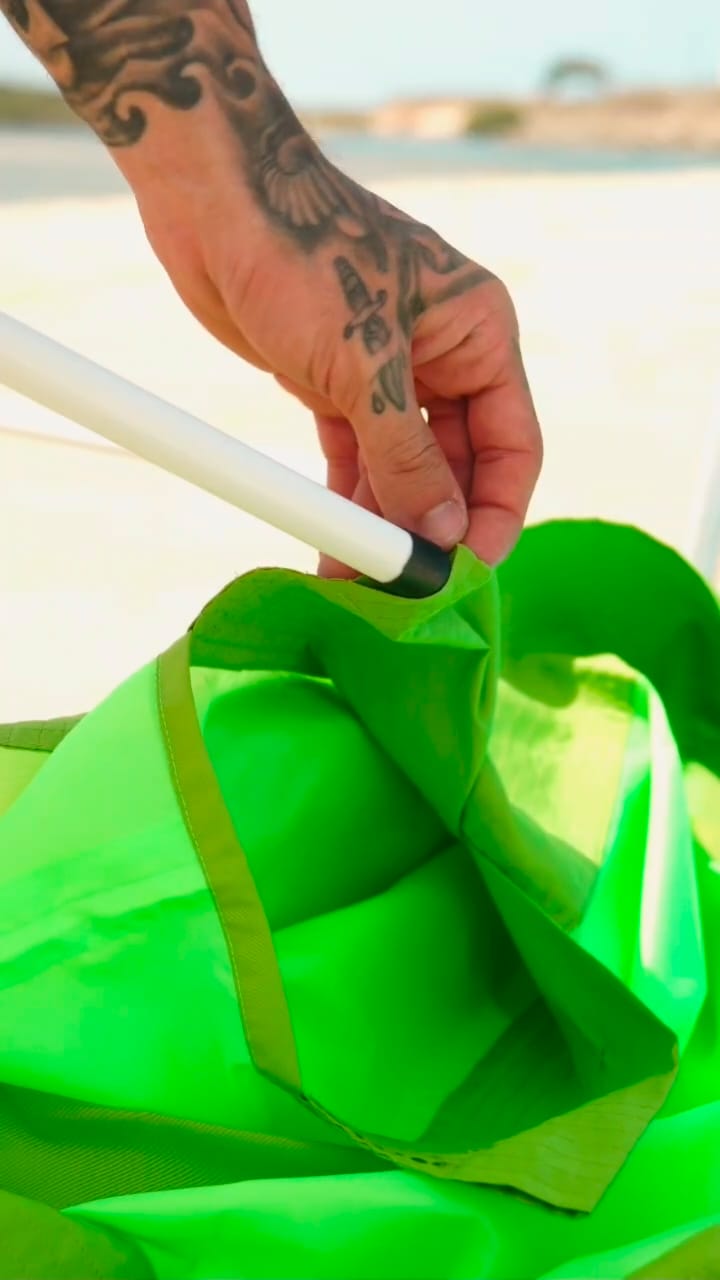
Each arm must have a rubber-capped end. Insert this protected end first into the fabric opening, starting from the centre: one arm on each side. Keep the aluminium edge from touching the fabric directly.
After preparing the poles and guyline for your model, follow these steps to stabilise the canopy.
Choose a wide, flat area of firm sand. More compact sand, such as sections closer to the sea, helps hold the base. Avoid loose sand and very uneven ground.
Bury between 1/3 and 1/2 of the base section’s length in the sand. This section anchors the structure to the ground.
The upright pole must form a right angle with the ground. Check from the front and side: it must not lean.
Fill the fabric storage bag with sand and place it along the same wind and fabric axis, as shown in the photos. The bag, upright pole and fabric should be aligned.
Keep the guyline taut without slack, but do not pull hard enough to tilt the upright. Check that the attachment point is correct for B9 or B20.
Check the wind direction from time to time. If it changes, reposition the bag and adjust the guyline to keep the pole upright. Constant adjustment is not needed.
The canopy relies on wind to support the fabric. Brisamar gives approximately 12 knots (22 km/h) as a reference for full operation. In light winds, the fabric stays low.
This video shows the sections for both models. For B20, follow the guyline position shown by the yellow line in the photo and in the dedicated video below.
The original videos are in Portuguese. Written instructions on this page are in your selected language.